Filters are a great tool in Kibana that help you to pinpoint specific data, reduce the data on view and remove data you don't want to include in any visualizations you create.
Filters can be added from any of the main screens as outlined our other articles around using the various screens.
Filters consist of several elements:
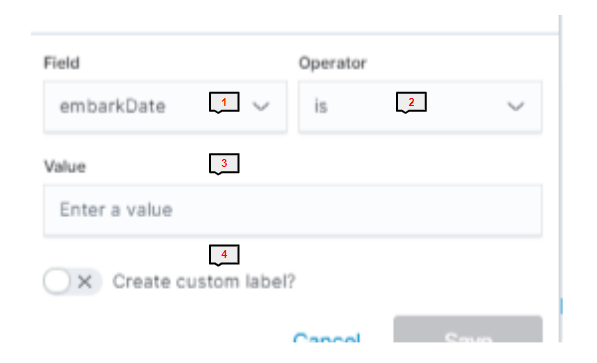
1) Field
This is the field you want to filter by. This will be a list of the available record types available in the data set and visualisation you are using. Commonly used ones are date, embark date, status, nationality etc.
2) Operator
The operator is the parameter/range you want to filter in. Dependent on what you have chosen as your field you will be able to select from various options.
Example 1
Field is date. So your operator could be "is between" and then you enter values for start date and end date (see our Kibana Dates article for more info on dates). This returns a filtered result of data between the two specified dates.
Example 2
Field is statusName. So your operator could be "is" and the value is selected from the available list, in this case "Available." This returns a filtered result showing only records with "Available" status.
3) Value
This is the value that you are aiming to filter by. If using a date operator, you would enter an appropriate date or date period. Where you are using a record as the operator, the drop down will provide you with the relevant values you can use.
4) Create Custom Label
Rename the filter to something easy to remember and recognise.